Making a Sale at the Terminal
The POS terminal is a full-screen, keyboard-friendly interface designed for fast retail transactions.
Step 1 — Search for Products
Use the search bar (top of the terminal) to find products by:
- Product name
- Product code / barcode
Results appear as you type. Click a product to add it to the cart.
Step 2 — Adjust the Cart
Once a product is in the cart:
- Change the quantity using the +/− buttons or type directly
- Remove a line with the × button
- The cart shows line totals, VAT, and grand total in real time
Step 3 — Select a Customer (Optional)
For loyalty or account customers, click Customer and search by name or code. Walk-in sales use a default Walk-in Customer record automatically.
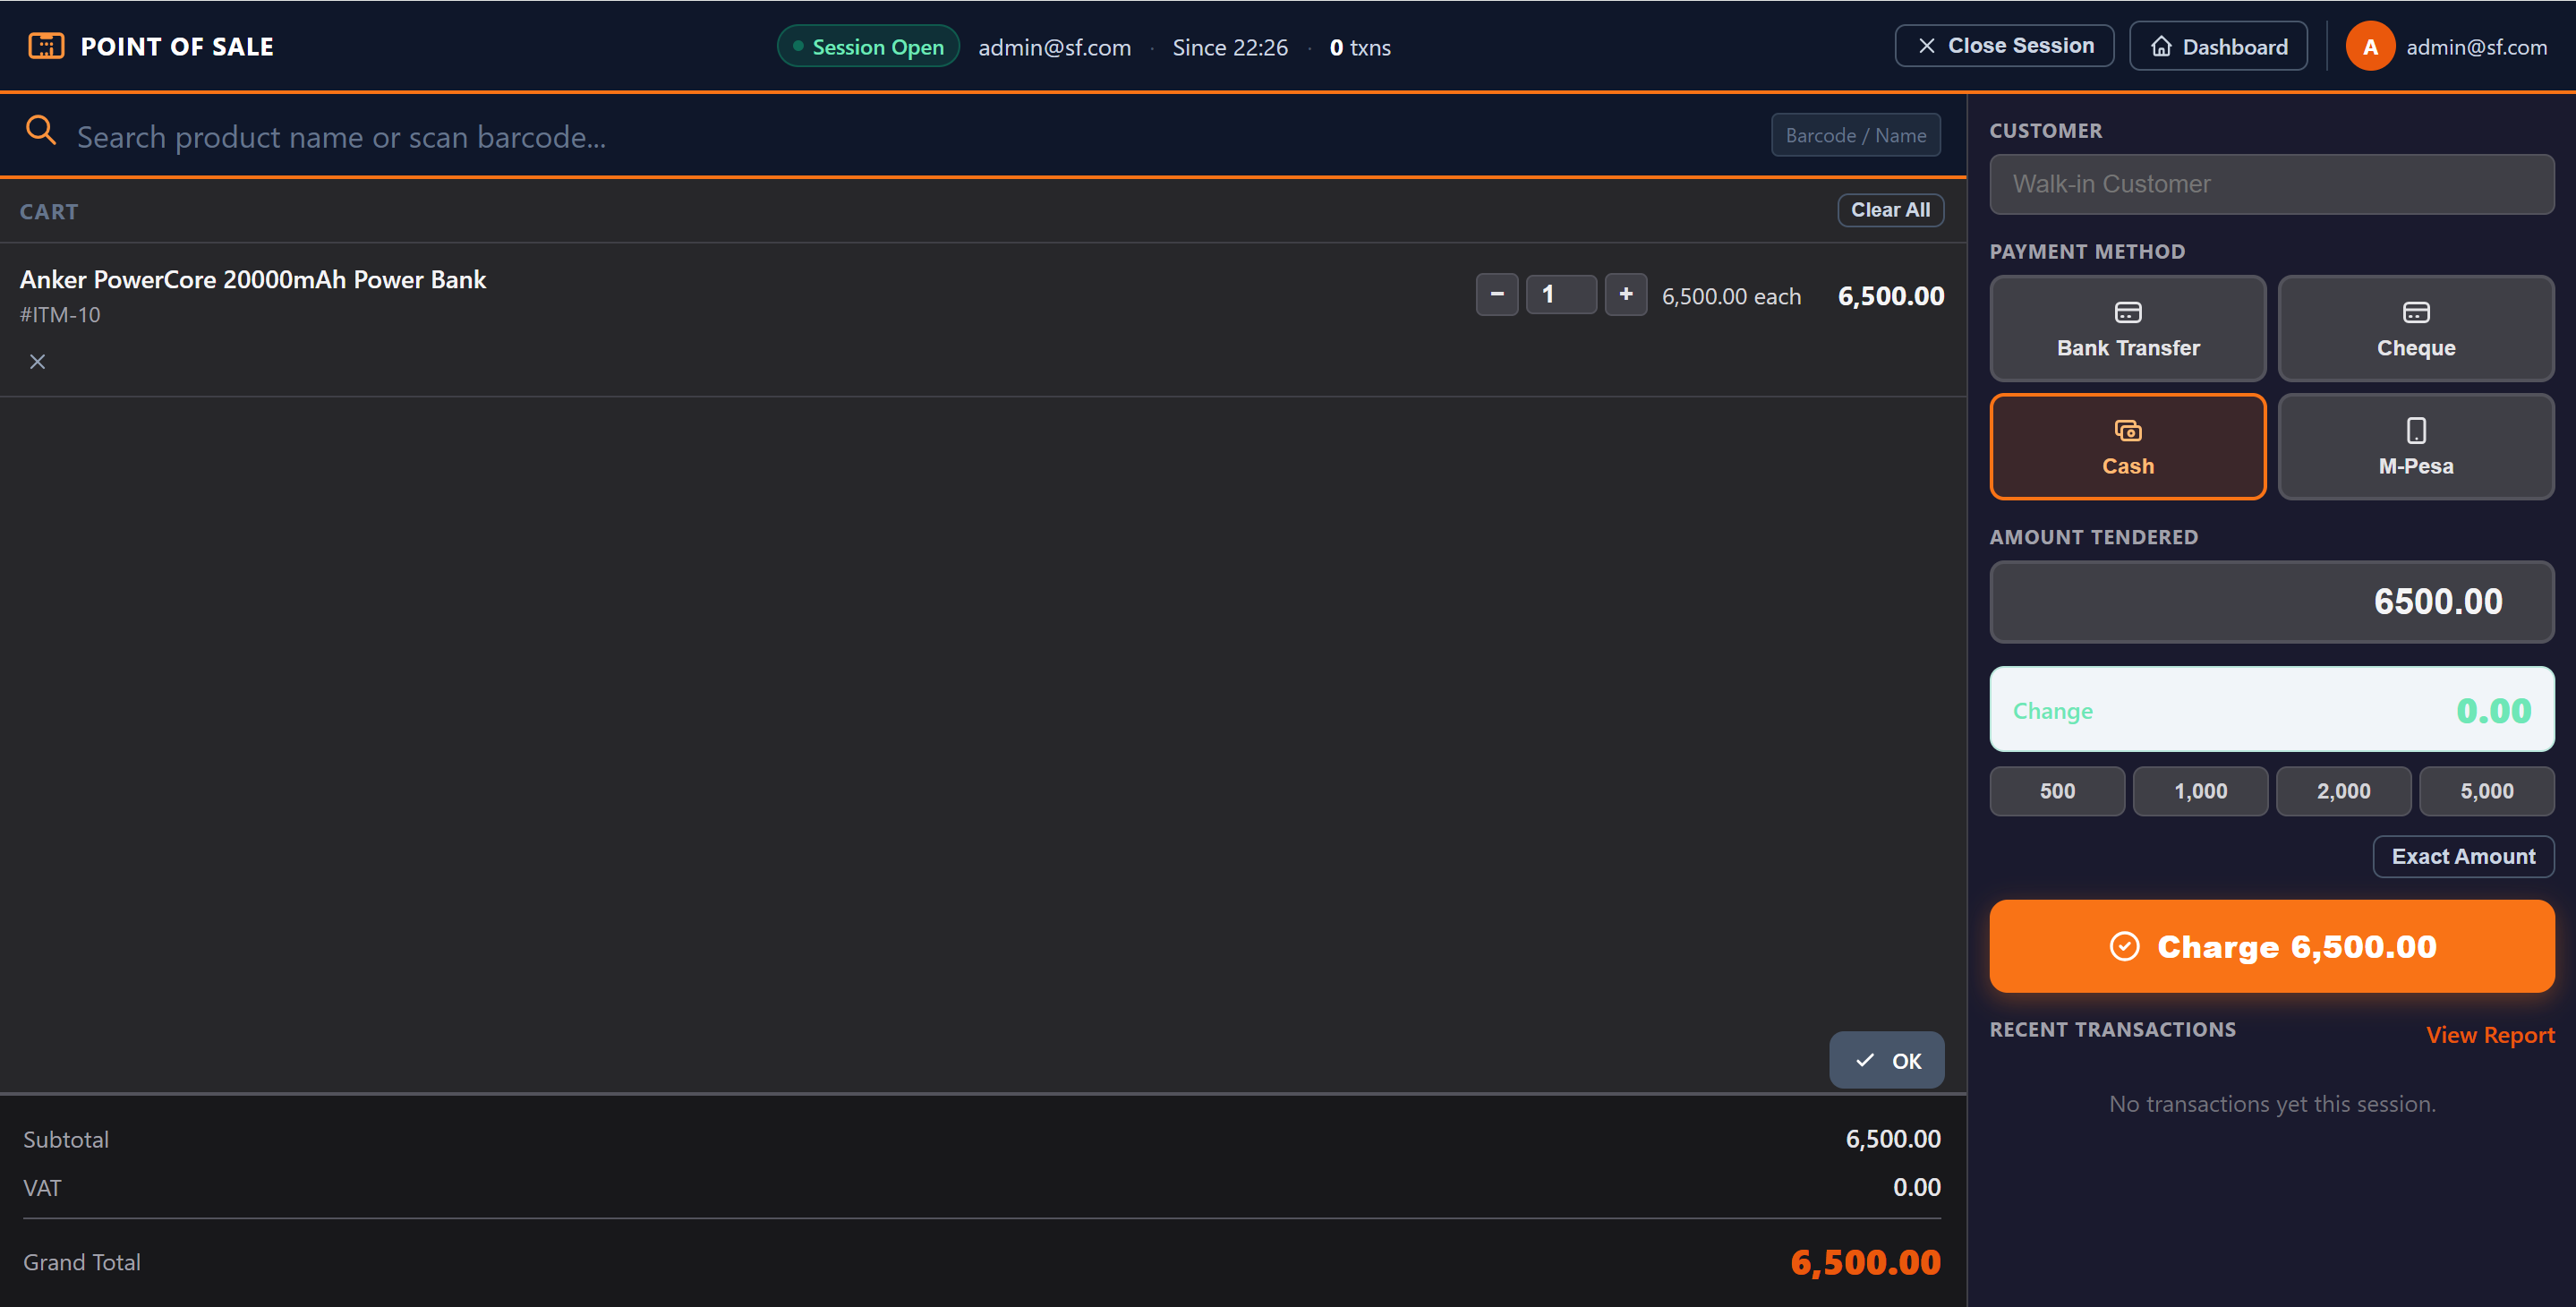
Step 4 — Choose Payment Method
Click Charge to open the payment panel. Select:
- Cash — enter amount tendered; change is calculated automatically
- M-Pesa — record the M-Pesa reference
- Card — record card payment
- Bank Transfer — record transfer reference
Enter the Amount Tendered for cash payments.
Step 5 — Complete the Sale
Click Complete Sale. The system:
- Creates a confirmed Sales Order
- Generates and posts a Sales Invoice → DR Debtors / CR Revenue / CR VAT
- Creates and posts a Customer Payment → DR Cash/Bank / CR Debtors
- Deducts stock from the warehouse with available inventory
- Records a POS Transaction in the current session
- Opens the Receipt for printing (auto-print if connected to a receipt printer)
Receipt Printing
The receipt opens in a new browser tab and prints automatically if the page was opened from the terminal. Use your browser's print to send to a thermal printer.
💡 The receipt uses your Company Name and Email from the company profile.
If a Sale Fails
If a product has insufficient stock, the sale is blocked with an error message. Restock the product or remove the out-of-stock item from the cart.